
SQL Server Import and Export Wizard is a simple way to copy data from the source to a destination. In this post, we will discuss, how to Import Data from the Excel File into the SQL Server Database table.
First, we need to open the “Import and Export data” wizard. Here we will try to open Wizard in two ways.
- From Windows Start Menu
- Using SQL Server Management Studio
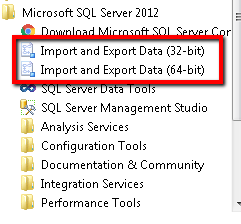
- From Windows Start Menu – Click on the Start menu, point to All Programs, point to Microsoft SQL Server, and then click Import and Export Data.

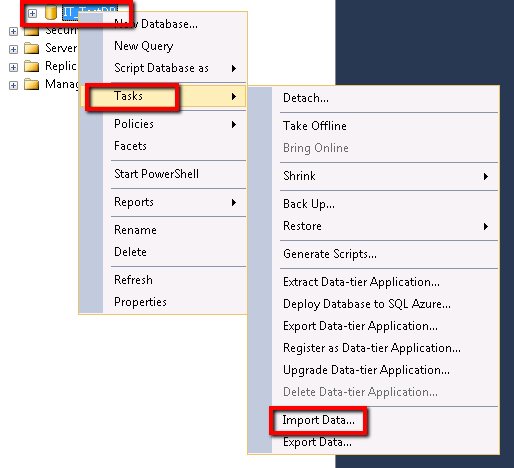
- Using SQL Server Management Studio – Open SQL Server Management Studio; select the Database in which you want to import the data, and then right-click the mouse button. Then navigate to “Tasks” and then Click on “Import Data”.

Steps to Import Data – Once the Import and Export wizard open now let’s start with Importing the data.
- SQL Server Import and Export Wizard – The SQL Server Import and Export Wizard screen will open. This is just a starting page or you can say it as a Splash screen where general information is given. Click on the “Next”


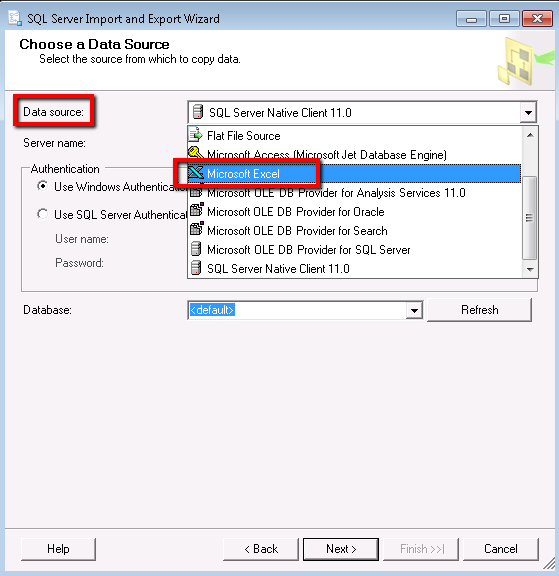
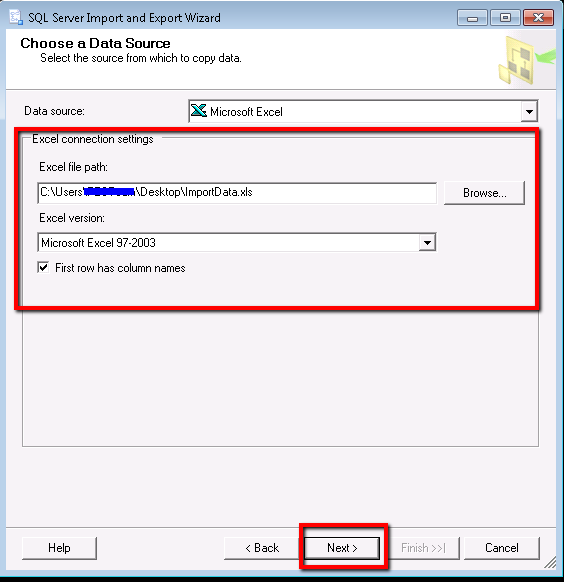
- Choose the Data Source – The next step is to select the Data Source from which data has to be imported. As in this post, we are going to import data from Microsoft’s Excel file so Choose “Microsoft Excel” from the drop-down list of Data Source.

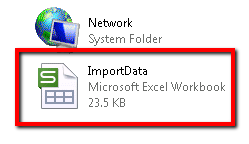
- Excel File Path – After the user selects the “Microsoft Excel” from the drop-down, the below screen will open where the user needs to input the “Excel file path” i.e. the Location of the Excel file.

- Excel Version – After file path, choose the correct Excel version.
- First Row has column name – If the Excel file contains the first row as column names, select the Checkbox “First row has column names”. By doing this, while importing data, the First row will be treated as Database columns (We can rename it later also). After this Click on Next button.

- Excel File Path – After the user selects the “Microsoft Excel” from the drop-down, the below screen will open where the user needs to input the “Excel file path” i.e. the Location of the Excel file.
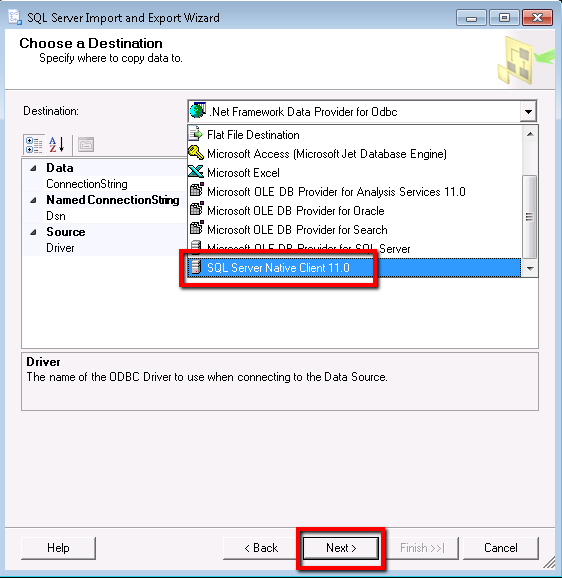
- Choose a Destination – The next step is to choose the destination where the data is needed to be copied. As we are importing data in SQL Server Database so the user needs to select the “SQL Server Native Client 11.0” from the Destination Dropdown.
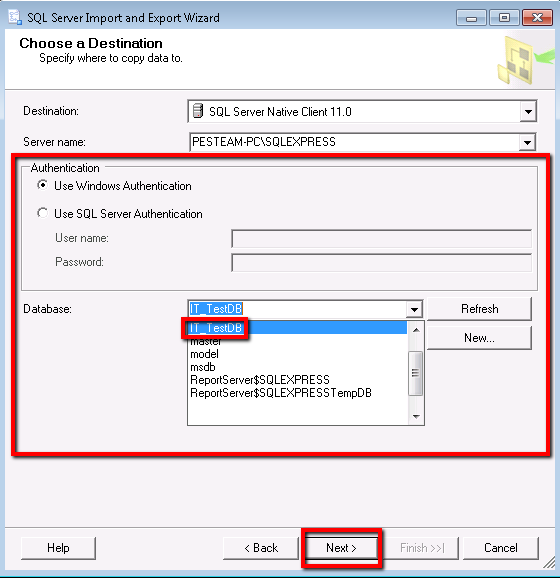
 Once the “SQL Server Native Client 11.0” is selected from the drop-down, the below screen will appear. Here user needs to define the Destination path/Settings.
- Server Name – Here provide the Server name (SQL Server Database Server IP Address). If SQL Server is installed on the same machine where “SQL Server Import and Export Wizard” is running, then we can give server name as localhost.
- Authentication – Select the Authentication mode to log in to the server
- Use Windows Authentication – If you are importing Data to the same server and Windows authentication mode is enabled, choose this option.
- Use SQL Server Authentication – If you are importing data into the database which is installed on some remote location choose this option and input the Username & Password for the server.
- Database – After Authentication, list of all the available databases will be listed in the Database drop-down list. Choose the appropriate database in which data needs to be imported. After this click on the “Next” button.

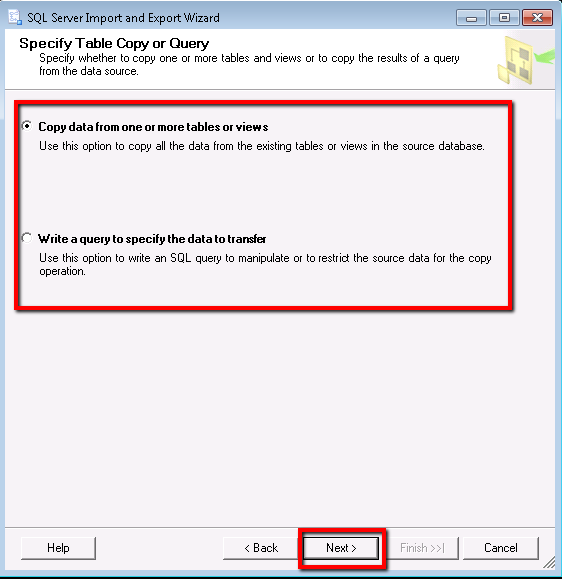
- After clicking the “Next” button “Specify Table Copy or Query” screen will open. Here we can choose from below two options.
- Copy data from one or more tables or views – You can use this option if you want to copy whole data from the existing table(s) or View(s).
- Write a query to specify the data to transfer – If you want to manipulate or restrict the data based on SQL query selection, use this option.
After this click on the “Next” button.

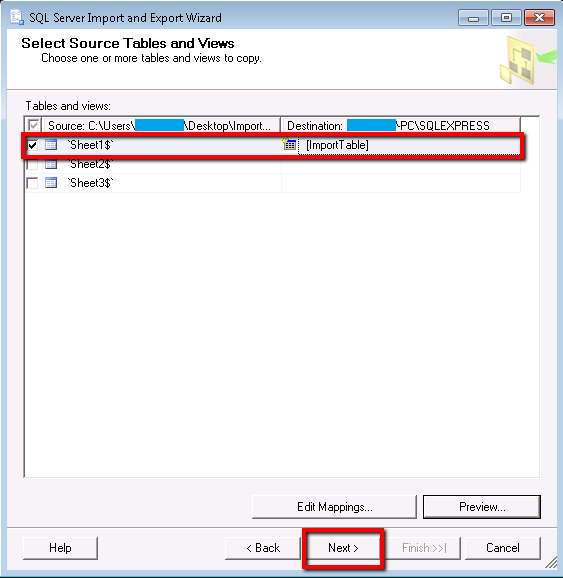
- After this, “Select Source Tables and Views” screen will appear; here we need to define the Source and Destination paths.
- Source – Select the excel “Sheet” from which data is to be imported.
- Destination – Select the Table from the Database or Enter the new Table name to which the data is to be copied.

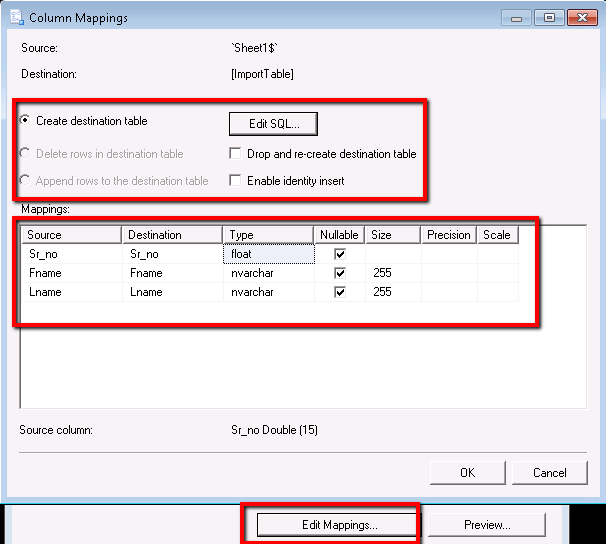
- Edit Mappings – If you want to edit the Mappings for the Source and Destination columns, click on the “Edit Mappings” button. Here you can also change the Datatype, Size of the column etc. Press “Ok” button to Save & close the screen.

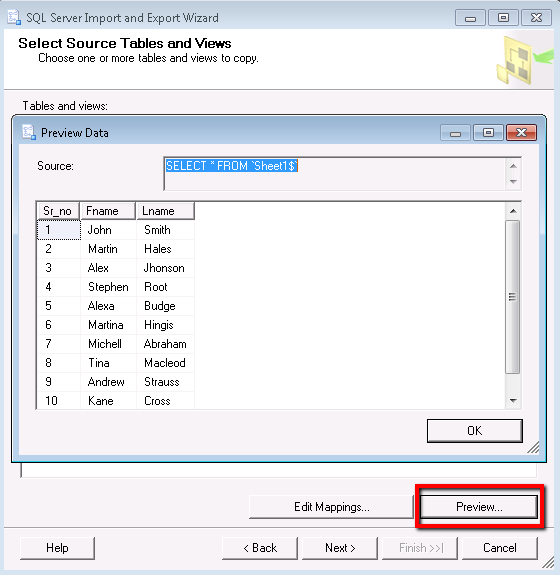
- Preview – Use this button to preview the data from the Excel sheet. Press “Ok” button to close the screen.

Click on the “Next” button to move forward.
- Save and Run Package – Select the checkbox “Run Immediately”. Here can you can directly click on “Finish” button to execute the process or click on “Next” button to view the description of the action.


- Complete the Wizard – If you have clicked on “Next” button the below action description screen will appear. To perform operation click on “Finish” button.


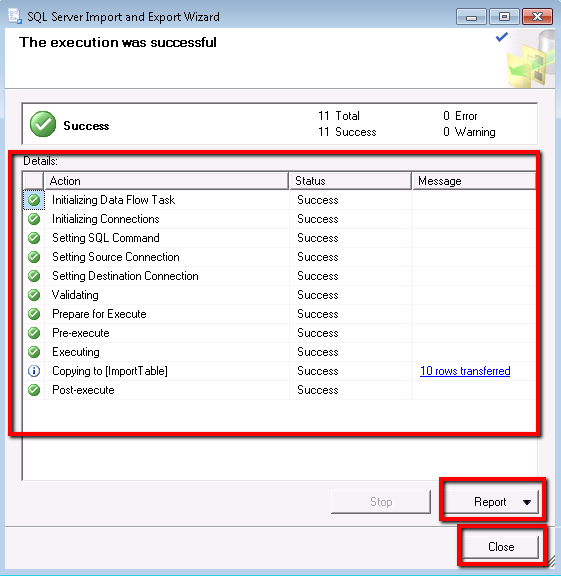
- After clicking on “Finish” button the import process will start. You can “Stop” this operation at any time.


- Once the operation is complete, the status window will be displayed. you can click the “Close” button to close the wizard.

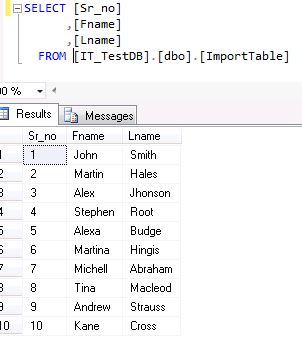
- Now you can verify the data inserted in the table which we have given at the time of Importing process.
